Analytics
Tracking AMP Traffic Using Google Analytics Segments


When we first launched AMP on our sites, we followed Google suggestions and split up our Google Analytics into two separate profiles – one for AMP and one for the rest of our web traffic.

As a network, we recommended our publishers running AMP do the same. Unfortunately, this led to having to check two sources to get the complete view of your traffic. Even worse? For those of us addicted to Google RTA, our numbers weren’t nearly as exciting as they should be.
Now with a single profile, you can get the big picture on how your overall traffic is doing with both AMP and web traffic, and our dashboard will correctly pull in the stats for both.
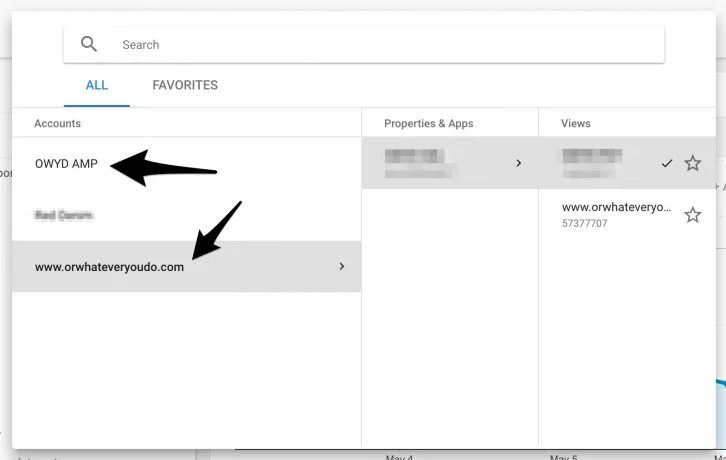
If you have already set up AMP analytics with Mediavine, here are some instructions for switching over to a single profile.
However, the Google Analytics dashboard doesn’t make it immediately obvious how you can check out AMP versus non-AMP traffic. It takes a little work, so continue reading.
By using this trick, you should be able to easily add a “segment” that tracks your AMP traffic to see how your AMP traffic is comparing to your overall traffic on any screen.
In fact, using this trick, we will show you how to create a non-AMP segment as well, so you can see how your non-AMP traffic performs relative to your overall.
We simply aren’t seeing the ad performance on AMP yet, and consider our AMP ads a beta offering until overall ad performance improves in AMP.
Now onto nitty gritty!
First, we need to explain what segments are. Segments are way to “filter” specific types of traffic and users going to your site on any screen of Google Analytics. You could set up a segment based on really anything. Users from Facebook, people browsing using Internet Explorer, or people from Canada. Whatever Google is tracking, you could more or less create a “segment” of those users and track their behavior.
For the purposes of our guide, we’re going to focus on two segments and take advantage of the fact that AMP automatically sets a different “data source” for analytics tracked through the “AMP Analytics” code.
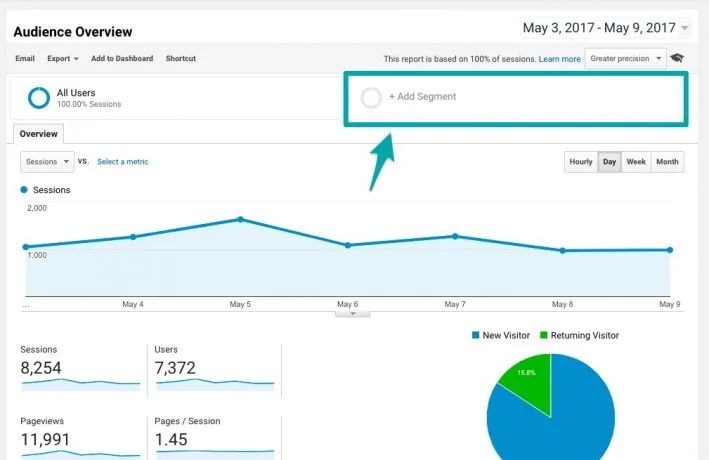
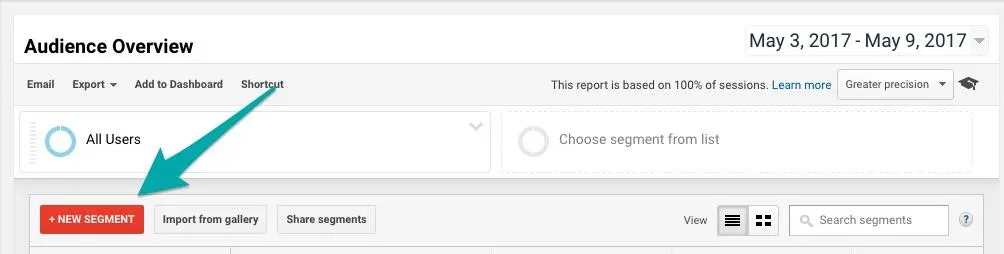
Our first segment? We’re going to create an “AMP” Segment. You can set this up manually by clicking “Add Segment” at the top of any Analytics Screen and then clicking the red “+ New Segment” button.


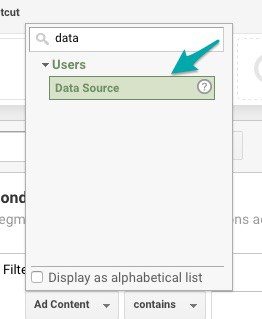
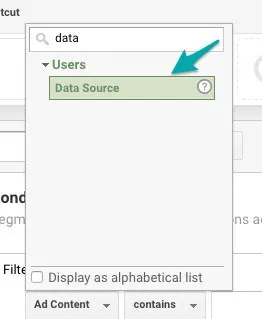
From here, you’ll want to name it “AMP,” and go to Conditions under Advanced in the left.

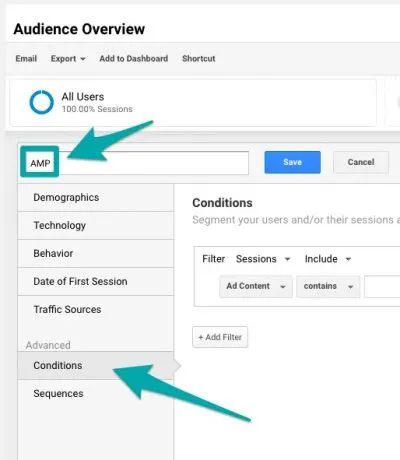
We want to choose “Data Source” under the filter:
Leave contains in the dropdown and type “amp” in all lower case in the text box.
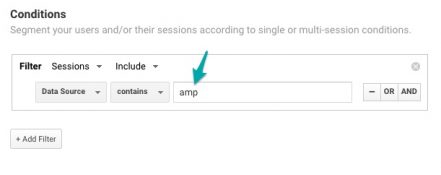

Then simply click save and you’ll now have an AMP segment!


If you want an easier shortcut, we’ve saved a template that will automatically create this segment for you. You’ll just have to name it.
With this segment created, you can now go to any screen (except Real Time Analytics), and apply this segment by clicking “Add Segment” and choosing the newly created AMP segment. You can leave on the default segment “All Users,” to compare AMP traffic against your total or turn it off to just browse AMP traffic.
If you’re interested in running comparisons of AMP versus Non-AMP traffic, we’d also recommend creating a NOT Amp Segment. You can follow the same instructions above and choose “does not contain” or use this template.
We know this was a bit of an advanced blog post about Google Analytics, so please let us know if you have any questions!
Stay up to date with the latest from Mediavine

 Eric Hochberger
It’s been two and a half years since Google first announced Google Analytics 4, the latest version of its ubiquitous Google Analytics service. Beginning last week, many publishers began receiving …
It’s important to create new posts for our blogs, but that’s not the only way to get search traffic to your site. Sometimes we forget that we’re sitting on a …
Do you speak the Google Analytics lingo or are you in the “I can find pageviews and that’s about all” camp? Whether you’re here, there or somewhere in between, Sherry …